Underwater Portraits in Moalboal: How to Shoot Sardine Runs Without a Professional Rig
Underwater Portraits in Moalboal: How to Shoot Sardine Runs Without a Professional Rig
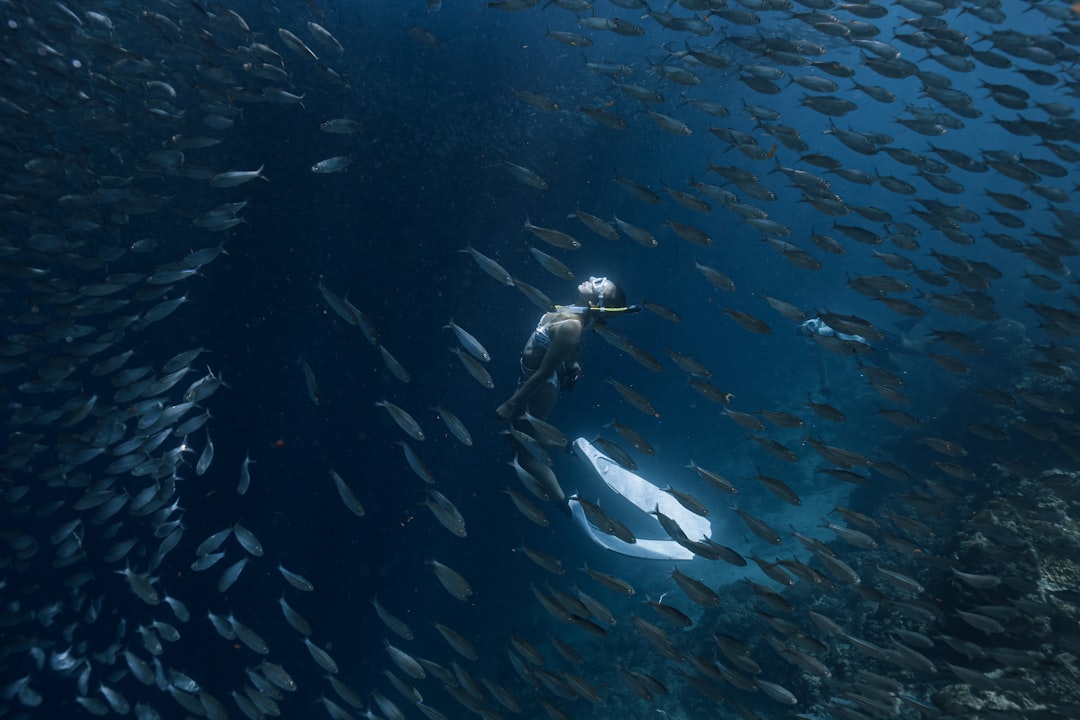
Just like being in a underwater documentary: a swirling silver tornado of sardines, backlit by tropical sun, with a lone diver suspended in the center like a spacewalking astronaut. Moalboal, on the southwest coast of Cebu, is famous for exactly this spectacle—a permanent bait ball of millions of sardines that hug the reef just meters from shore. You imagine yourself capturing that shot, the one that will stop your Instagram feed cold, even though your camera gear fits in a dry bag smaller than your pillow.
But here’s the truth nobody tells you before you wade into the water: these fish are chaotic, the light is unforgiving, and your waterproof compact camera or GoPro can either produce a gallery-worthy image or a series of blurry, green-gray blobs that look like you dropped your phone in a washing machine. The difference between those outcomes isn’t a professional rig—it’s knowing exactly what to do in the first five seconds of your dive, and having a plan for the 20 minutes that follow.
The 10 AM Rule
Your first mistake, if you make it, will be assuming the sardine run looks good whenever you feel like showing up. It doesn’t. The sardines at Moalboal’s famous drop-off—a wall that plunges from 10 feet to over 200 feet within arm’s reach of the shore—rely entirely on direction of sunlight. At 8 AM, the sun is low and hits the reef at a sharp angle, casting long shadows that turn the fish into a dark, undifferentiated mass. By 10 AM, the sun is high enough to penetrate the water column straight down, creating that ethereal backlight that makes individual fish scales catch the light like tiny mirrors.
A visit between 9:30 and 11:00 AM is the only window that matters. Later, after noon, the overhead sun becomes too harsh, flattening the light and washing out the silver contrast that makes the sardine run dramatic. The result is images that look like they were taken through a glass of iced tea—muddy and warm-toned, with no punch.
If you’re staying at one of the budget guesthouses along the Panagsama Beach strip, you can walk straight to the entry point at Savedra Dive Center or the small beach in front of the resort area. Your guide will tell you the fish are always there—and they are, theoretically—but the visual quality of your shots changes completely with the hour. Pay for a 9:30 AM boat or just swim out from shore; the sardines are only 50 yards from the beach, in about 20 to 40 feet of water.
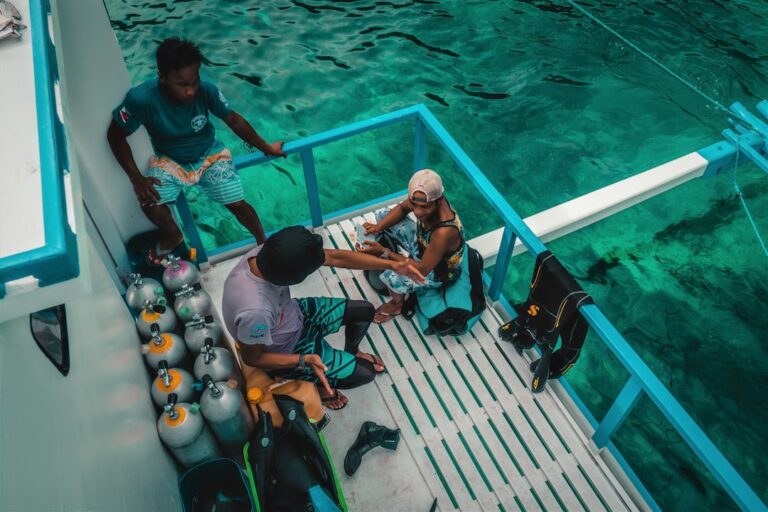
Gear That Will Not Ruin Your Shot
You do not need a Sony A1 in an $8,000 housing. You do need to understand the limits of what you have. If you’re shooting with a GoPro Hero 11 or 12, or an Olympus TG-6, you can absolutely get crisp, magazine-quality shots—if you lock your settings before you hit the water.
The single most important setting: manual white balance set to “underwater” or, better, custom-set to 5,500-6,500 Kelvin. Auto white balance will turn your silver sardines bright blue or, worse, sickly green as the camera tries to compensate for the blue water. You’ve seen those shots where the fish look like they were dipped in Windex—that’s auto white balance ruining a perfectly good moment.
Set your ISO to 200 maximum. The water in Moalboal is clear—20 to 30 meters of visibility on a good day—so you don’t need high ISO to compensate. Shutter speed should be at least 1/500th of a second. The sardines move fast. They don’t pose. They swirl, and if your shutter drags, you’ll get a silver blur instead of individual fish.
For GoPro users: shoot in 4K at 60 frames per second. You can pull still frames from the video later that will look better than any burst mode photo your GoPro can produce. The sensor is too small for reliable stills in low light, but video captures the motion and allows you to extract the perfect frame.
You don’t have a strobe arm, a video light, or a focus light. You’re going in with just the sun. This is fine—the majority of those gorgeous shots you’ve seen were taken with natural light—but you need to position yourself relative to the sun with the precision of a wedding photographer arranging a couple for golden hour.
When you descend to the sand at the base of the drop-off, about 30 feet down, look up. Your subject is above you. The sardines hover in the water column anywhere from 10 to 30 feet deep, depending on current and time of day. You want to be beneath them, looking upward, with the sun behind the fish. This backlighting will turn each fish into a silver dart with a bright edge, creating the drama that separates a snapshot from a portrait.
Get low. Get on the sand or on a rock. If you float in mid-water, you’re at their level, and the shot becomes flat. Anchor yourself against the current—Moalboal can have a moderate current running parallel to the reef—and shoot up. You’ll feel foolish lying on the bottom with your camera pointed at the sky, but that single position is responsible for 80 percent of the best sardine run images you’ve ever seen.
The First Contact: Entering the Bait Ball
Here’s what will happen, and you need to recognize it before it happens. You drop down, you see the silver wall ahead, and your instinct is to swim straight into the middle of it. You want to be surrounded by the tornado, to have fish streaming past your mask. So you kick hard, you surge forward, and the fish part like a curtain and disappear. The bait ball scatters. Now you’re floating in empty blue water, and the fish have reassembled 30 feet away, and you’ve used up 15 percent of your air and your heart rate for nothing.
Patience is your actual rig. The sardines are wild animals, and they react to sudden movement. Approach slowly—glacially slowly—from the deep side, not from the shallows. They feel less threatened when you come from the open ocean side of the ball. Kick gently, with long, slow frog kicks. When you’re within 10 feet, stop moving. Hover. Let them acclimate to your presence. In 60 to 90 seconds, they will close back around you. That’s your window. Now you can shoot.
The moment the fish re-form around you—when you are in the center of the silver cloud—is the moment you need to fire. Do not wait for a “better” composition. The ball is dynamic; it pulses and shifts with every passing jackfish or turtle. The first 20 seconds after you stop moving are your best. You are fresh, your breathing is controlled, and the fish have not yet decided you’re boring.
Shoot in bursts. Fire three to five frames per second. You will throw away 90 percent of them—a fish tail here, a blurry fin there—but the 10 percent will be keepers. Focus on the edge of the ball where individual fish are silhouetted against the bright surface. That’s where the contrast lives. The center of the ball is a dense, dark mass that reads as a solid silver shape; the edges are where you find the texture, the light, the life.
Composition: What Actually Makes a Good Shot
A sardine run photo with no human figure is a fish photo. A sardine run photo with a diver, a snorkeler, or even a silhouette is an adventure portrait. You need a subject to give scale. The ball can be 50 feet across, but without a person in the frame, the viewer has no reference point—it just looks like a big silver blob.
If you have a dive buddy, work together. Position them at the edge of the ball, looking in or out, with fins pointing toward the camera. A diver with arms outstretched, reaching toward the fish, creates a narrative: exploration, wonder, immersion. If you’re solo, look for other divers and ask—most will be happy to be in your shot, and you can return the favor.
Shoot from below and slightly to the side. Directly underneath produces a geometric pattern that can be striking, but a slight angle—30 degrees off vertical—gives the image depth and dimension. The fish will have a sense of receding into the blue, and your subject will feel integrated into the scene rather than pasted on top of it.
The reef at Moalboal is a wall of hard and soft corals, but it’s not particularly colorful. It’s browns, grays, and pale purples. If you frame your shot with the reef as your background, you get a muddy, unappealing backdrop that fights with the silver of the fish. The solution is simple: shoot toward the surface. Use the blue water column as your background. The gradient from deep blue at the bottom to bright turquoise at the top is a natural, beautiful backdrop that makes the fish pop.
If you can find a shaft of sunlight—a direct beam from the surface—position your subject so the beam passes through the ball. That column of light acts like a spotlight, isolating the fish and creating a three-dimensional effect that feels almost cinematic.
Handling the Current Without Panic
Here’s a detail the blogs often skip: Moalboal can have a serious current running along the drop-off. You might enter the water, descend, and immediately start drifting north or south at a pace that feels alarming. The fish don’t care; they just drift with it. You have to drift too.
Don’t fight it. Fighting the current will exhaust you, spike your air consumption, and leave you too winded to hold your camera steady. Instead, treat the drift as a slow-motion dolly shot. You are moving through the sardine ball, and the fish are moving with you. You can shoot continuously as you drift, getting the same composition from different angles without any effort.
The key is knowing your exit. Before you enter, identify a landmark on shore—a specific boat, a building, a tree—that you can reference every few minutes. If you drift too far, you’ll surface a half mile from your entry point, which means a long swim back against the current. Most dive centers in Moalboal offer guided dives that manage this for you; if you’re going solo, stay within 200 meters of the main entry point and check your position every two minutes.
Post-Processing: Saving What You Shot
No matter how careful you were with your in-camera settings, your raw files or video frames will need adjustment. The water filters out red and orange wavelengths first, so even the best underwater shots have a blue or green cast.
In Lightroom, iMovie, or DaVinci Resolve, the single adjustment that saves underwater footage is the white balance eyedropper. Click on something that should be neutral gray—a rock, a patch of sand, the white part of a diver’s wetsuit—and the entire color palette snaps into place. The sardines will go from blue-green to true silver. The skin tones of your subject will go from corpse-pale to natural.
Add +10 to +15 clarity or contrast to bring out the individual fish scales. Add +5 to +10 vibrance, not saturation—you don’t want the blue to become cartoonish—to give the water depth a subtle pop.
Your best shot might be a full-frame image of the ball, but it’s probably better cropped. Tighten in on the area where the fish are densest, where the light hits them strongest. Remove empty space that doesn’t add to the story. A 16:9 crop, like a movie frame, can give your image a widescreen epic feel, especially if you have a diver at one edge looking into the ball.
Don’t be afraid to convert to black and white if the color still looks off. Silver sardines, black water, a diver in a bright mask—black and white can transform a mediocre color shot into a high-contrast, moody piece that looks intentional rather than compromised.
The Second Day Edit
If you have multiple days in Moalboal, you will learn on day one and apply on day two. The first day, you will chase fish, miss the light window, and come up with 20 shots that are okay but not great. On the evening of day one, review your images on a laptop or tablet. Identify exactly where you were too high, too fast, or too late.
On day two, enter the water at 9:45 AM with a single goal: get below the ball, get still, and wait. Don’t move for the first five minutes. Let the fish forget you. Then shoot for 10 minutes, but only from that anchor point. The difference between day one and day two is the difference between a vacation snapshot and a photo you’d print and frame.
Moalboal’s sardine run is one of the most accessible, forgiving, and reliable underwater photography subjects in the world. It’s crowded sometimes, yes—there are days when 30 divers are hovering around the same bait ball—but the volume of fish is so immense that you will always have your own corner of silver to work with. Your camera doesn’t need to be expensive. Your training doesn’t need to be advanced. What you need is patience, an understanding of light, and the willingness to get low and wait.
The images you bring back from that 40-minute dive will outlast the memory of the gear you packed or the price of the room. They’ll be the ones you pull up years later, when you’re planning the next trip, and you’ll remember not the frustration of a missed focus but the moment the fish finally accepted you into their cloud. That’s the shot you came for. And now you know exactly how to get it.
📷 Photos: Chinh Le Duc (Unsplash), Chinh Le Duc (Unsplash), Gianni Orsatti (Unsplash)